
My goal for this post is to use a modified pizza dough to make Pepperoni Rolls – a staple fast food popular in the mining towns throughout West Virginia. They are the official “State Food” of West Virginia. They are delicious to the point of being a threat to anyone’s sense of self-control.
The approach is simple enough – you take a pizza dough that is ever-so-slightly enriched with a little egg and sugar (or honey) and wrap-up little parcels of pepperoni and mozzarella cheese to bake. No sauce – just pepperoni and cheese.
I would appreciate feedback from any readers in West Virginia who can comment with some authority on how the proportions of my ingredients stack-up against the established paradigms of pepperoni roll-dom recognized in your state. My own intuition keeps nagging me to boost the sweetness of the dough just a little bit, but I worry that I would be flying in the face of West Virginia tradition. Help me out here, OK.
The illustrations I provide below are abbreviated since my earlier pan pizza posts covered much of the mixing, kneading, and rising techniques in great detail.
—————————
In my Pan Pizza post from a while back I used the following ingredients and procedure for the pizza dough:
Total Flour – 100%
Total Liquid – 60% (of the total flour weight)
Yeast – .5% (of the total flour weight)
Salt – 2% (of the total flour weight)
Oil – 6% (of the total flour weight)
Procedure – For the pizza, I start with a preferment (I’ll address a faster approach below), mix in the remaining ingredients, knead, rise, deflate and shape, rise, assemble toppings, and bake.
I’m going to keep these percentages more-or-less intact and I’m planning to start with 12 oz. of flour (I’ll use all bread flour this time – AP is fine, I just have a surplus of bread flour right now) – that’s enough for 8 hefty pepperoni rolls.
Total Bread Flour – 12 oz.
Total Liquid – 60% x 12 oz. = 7.2 oz. (milk – mixed from instant non-fat dried powder)
Yeast – .5% x 12 oz. = .06 oz. (a little more than 1/2 tsp.)
Salt – 2% x 12 oz. = .24 oz. (I went with 1 1/2 tsp.)
Oil – 6% x 12 oz. = .72 oz. (I went with .75 oz. – scaled)
But for the pepperoni rolls dough, I want to ever-so-slightly enrich this recipe by adding: 1 egg yolk + 1 oz. honey (note – 1 oz. of honey is just a little bit over 1 Tbsp.). This means I will need to adjust the final liquid addition to maintain the appropriate hydration of the dough. Taking the liquid composition of the honey and the egg yolk into consideration, I get:
Honey – roughly 15% (liquid) x 1 oz. = .15 oz. liquid
Egg Yolk – 50% (liquid) x .65 oz. (weight of 1 egg yolk) = .33 oz. liquid
Total New Liquid = .15 oz. + .33 oz. = .48 oz. (let’s call it 1/2 oz.)
I want to include a total of 7.2 oz. liquid in my recipe, so I’ll use 6.7 oz. milk (from instant) + .5 oz. from the egg and honey addition. Whole milk would be fine to use here as long as you scald it first and allow it to cool to room temperature. I imagine that scalded buttermilk would impart a wonderful taste to the dough, but I wanted to master the traditional fundamentals before going on a creative spree. The purpose of the milk here is insure that the dough bakes into a very soft-crusted blanket for the pepperoni and melted cheese.
OK, that means my adjusted pepperoni roll dough recipe looks something like this:
Total Bread Flour – 12 oz.
Total Liquid – 6.7 oz. (milk – mixed from instant non-fat dried powder)
Yeast – .06 oz. (1/2 tsp.)
Salt – .24 oz. (1 1/2 tsp.)
Oil – .72 oz. (I went with .7 oz. – scaled)
Honey – 1 oz.
Egg Yolk – 1 (at room temperature)
————————–
Procedure 1 (more flavor) – Following the procedure outlined in the pan pizza post, I started with a poolish made using 6 oz. flour + 6 oz. milk (from instant) + 1/2 tsp. yeast. I allow this to sit for about 15 hours at room temperature. Everything else proceeds almost exactly as it did before: mix in the remaining ingredients, knead for 10 minutes in a stand mixer fitted with the dough hook, rise until doubled (about 2 hours), deflate and roll out, cut out rectangles for rolls, wrap pepperoni and cheese, cover and rise (about 45 minutes), and bake. For pepperoni rolls specifically, and for enriched doughs in general, the recommended baking temperature is less than the 400° F I used for the pan pizzas – I’ll be baking them at 350° F until golden brown.
Procedure 2 (less time) – Instead of making a poolish that will preferment for so long, a faster approach would be to weigh-out all of the ingredients at once into the bowl of a stand mixer and increase the yeast to 2 tsp., then knead for 10 minutes in a stand mixer fitted with the dough hook, rise until doubled (about 2 hours), deflate and roll out, cut out rectangles for rolls, wrap pepperoni and cheese, cover and rise (about 45 minutes), and bake at 350° F until golden brown.
Baking time is best judged by the appearance of the pepperoni rolls. Mine took about 23 minutes – I recommend checking on them frequently starting at around 20 minutes. I also recommend rotating the baking pan after about 10 minutes to insure they bake evenly.
In the first procedure, some of the flour and liquid is mixed with the yeast and allowed to preferment overnight before kneading with the remaining ingredients. In the second procedure, all of the ingredients are simply combined at the time the dough is kneaded. Two choices – one which takes longer, but generates a better flavor in the dough – one which takes much less time. From the kneading point forward, the rest of the steps are identical and take the same amount of time – so you need only decide if the additional flavor generated during the prefermentation process is worth starting the process the night before you intend to eat.
I’ll illustrate results from both procedures below – there is very little discernible difference in appearance between the two – perhaps the ones made using the shorter procedure are a little bit puffier because the additional yeast in the recipe generates more activity in the oven at the start of the baking time (more oven spring).
————————–
Procedure 1 – For this example, I had to use salami to make my pepperoni rolls because the pepperoni in my refrigerator looked suspicious and possibly unsafe for consumption. I probably could have photographed the results carefully enough to convince you I was using pepperoni, but I’m trying to write these posts using the “Honesty is the best policy” approach. So there you have it – pepperoni isn’t immortal. Nothing else about this recipe changes, though, between using pepperoni and salami.
Spoiler alert: There’s a good reason why the official state food of West Virginia is pepperoni rolls and not salami rolls. Sometimes the difference between “great” and “very good” is huge.
Here’s a little tour of how things went:

We’ll join the dough after all of the ingredients have been mixed-in, the dough has been kneaded for 10 minutes using a stand mixer, and allowed to rise until doubled (which was about 2 1/2 hours).

Same dough coaxed out of its rising bowl onto a clean counter top.

I deflated the dough by rolling-it-out with a rolling pin into a rectangle – about 9″ x 16″ – the dimensions aren’t critical as long as you have a large enough rectangle to slice-up for your rolls.

Lengthwise…yeah, you can see that it isn’t a perfectly shaped rectangle.

Width.

Divided into 8 rectangles for rolls.

A healthy layer of salami – which should have been pepperoni.

A healthy layer of shredded mozzarella cheese.

Bring-up the sides and pinch them together to form a seal lengthwise.

Place the rolls, seam-side-down, on a baking sheet pan (mine has a silicone baking mat between the rolls and the baking sheet – makes cleanup a breeze!).

Cover with plastic wrap and allow to rise for about an hour or so.

Here, you can see that the dough has swollen from the activity of the yeast. Almost ready for baking.

As a final touch here, I brushed the rolls with melted butter and sprinkled them lightly with sea-salt flakes.

Judge when the rolls are done by their exterior. They are done when they are golden brown and look done – mine were done in about 24 minutes.
Cross section about to be devoured. Sadly, they really are much better with pepperoni.
————————–
Procedure 2 – For this example, I was able to make my pepperoni rolls with quality stick pepperoni. Before using the slices of pepperoni that I extracted from my stick, I placed them in a single layer on two sheets of paper towel, covered them with another two sheets of paper towel, and microwaved that absorbent sandwich for 45 seconds to blot-off some of the grease from the pepperoni. I don’t have a picture of that step here, but you can refer-back to my pan pizza saga for an illustration of the process (it’s at the very end of that initial pan pizza post).
Here’s a little tour of how things went:

We’ll join this process after the dough has been rolled-out and cut into eight rectangles. This time, a thick layer of pepperoni has been established on top of each future roll.

A healthy layer of shredded mozzarella cheese.

Again, I brought-up the sides and pinched them together to form a seal lengthwise and then placed the rolls, seam-side-down, on a baking sheet pan (mine has a silicone baking mat between the rolls and the baking sheet – makes cleanup a breeze!). Cover with plastic wrap and allow to rise for about an hour or so. As a final touch here, I brushed the rolls with melted butter and sprinkled them lightly with sea-salt flakes.

Judge when the rolls are done by their exterior. They are done when they are golden brown and look done – mine were done in about 23 minutes.

Side detail – fresh out of the oven.

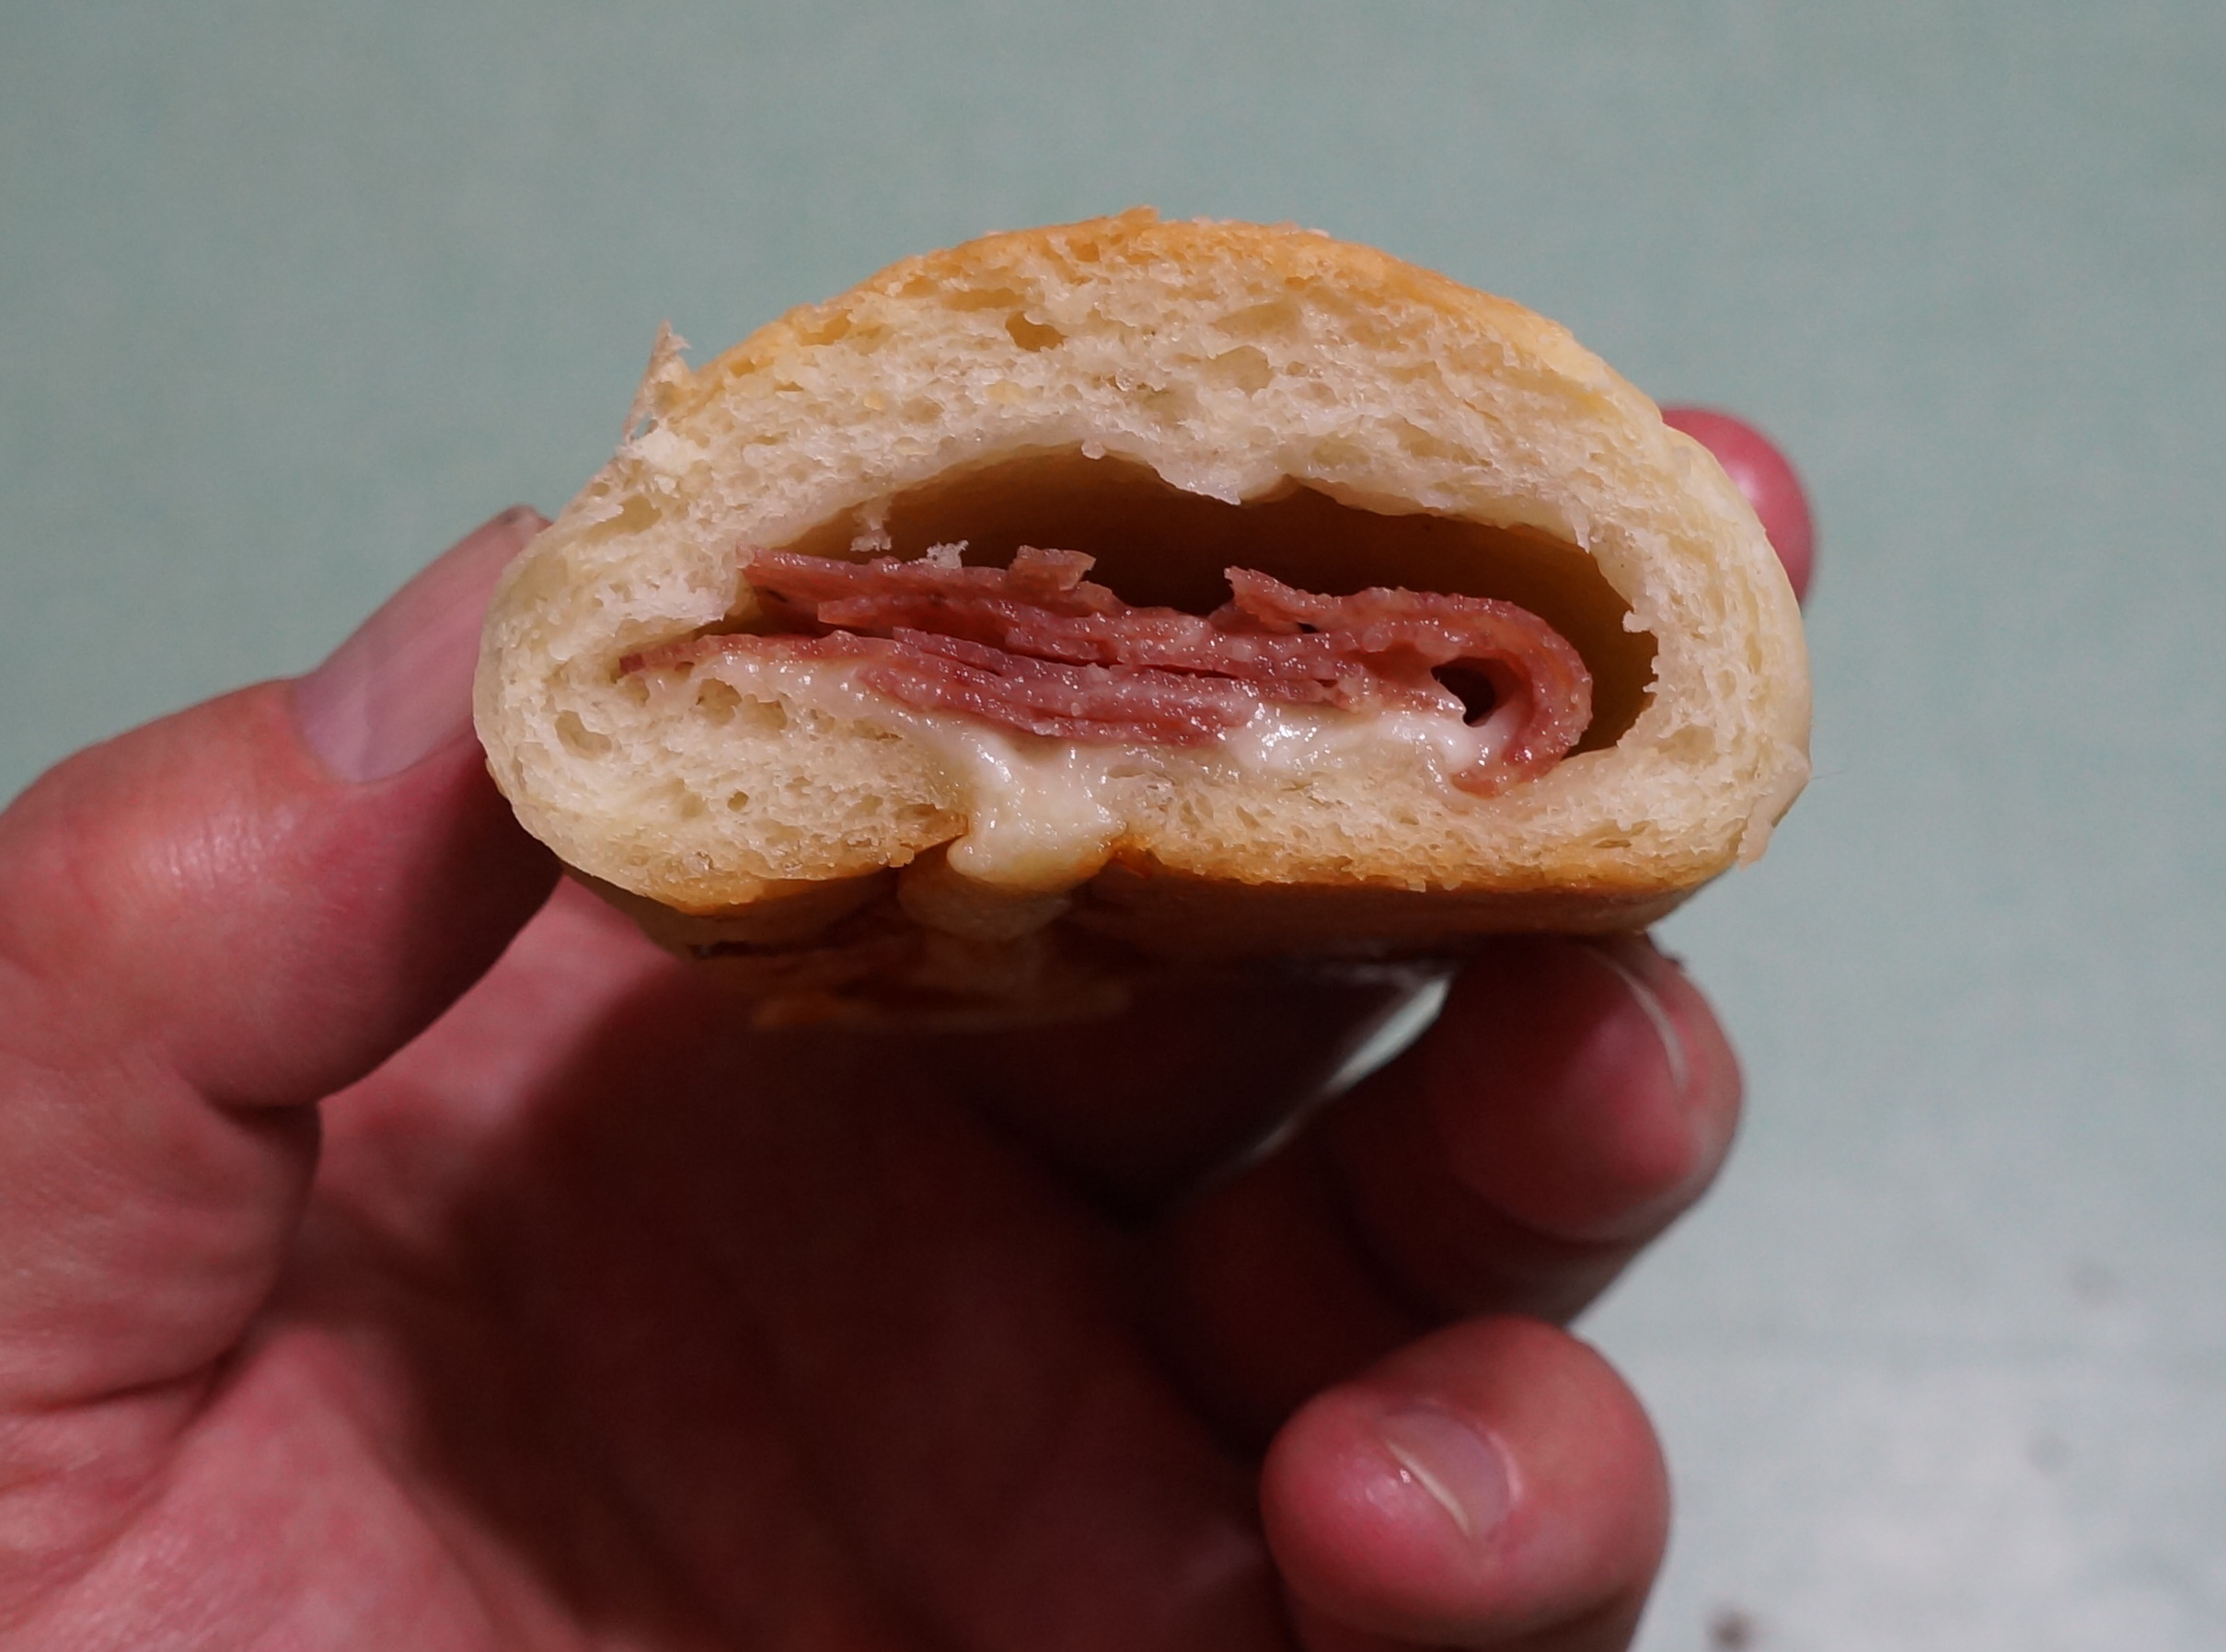
Cross section – the REAL pepperoni roll this time – notice how the grease from the pepperoni has been absorbed by the bread – that’s part of what makes a pepperoni roll so insanely delicious!
Recent Comments